
Game Boy Original DMG Rechargeable Battery Mod Installation Guide

SCREWDRIVERS AND FLUSH CUTTER NOT INCLUDED IN KIT
Products Used:
Game Boy DMG Rechargeable Battery
Game Boy DMG Shell Kit
Screwdriver Set
STEP 1: Remove back of DMG shell with a Y2 Tri-Wing Screwdriver. DO NOT THROW AWAY SCREWS.
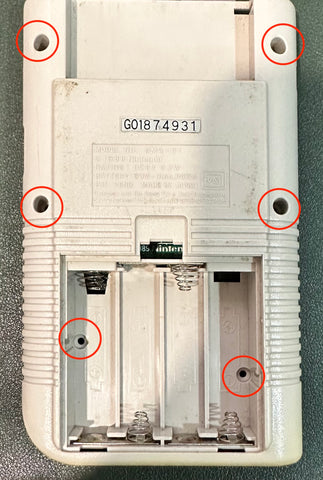
STEP 2: Remove 3 metal battery springs from the battery compartment. Use the screwdriver to push the clip from the back.

STEP 3: With flush cutters (make sure to use small ones to get more precision, like the ones use in jewelry making) remove the excess plastic trim in the battery compartment (area highlighted in pink). Make sure it is flush and no sharp points are sticking out. You can smooth it out with a Dremel, but not necessary.

This is what it should look like after removing the springs and excess plastic.

STEP 4: Carefully install the battery. If you notice it is not sitting flush, check for raised plastic and trim accordingly. If all is correct and works well, screw back on the shell.

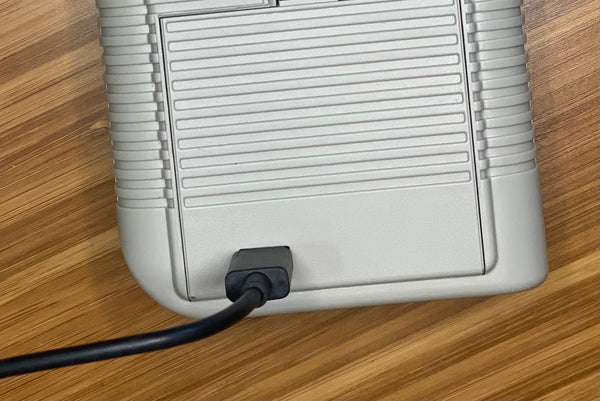
STEP 5: Optional - Trim hole in the back battery cover for easy USB-C Charger access. You would need to use a Dremel for this hole but it is not necessary for it to function.

If you have any questions please email us at: sales@godofgamingshop.com